Do you want to learn how to add Grammarly to Google Docs? Are you struggling to use Grammarly with Google Docs? If yes, then this blog post is for you. Writing clearly and professionally has become of the utmost importance, especially if you are a student, blogger, or working professional. In recent years, Google Docs has become a fantastic tool to write content, but its inbuilt grammar and spelling checking features lack some advanced correction capability. This is where Grammarly comes into the picture. You can integrate Grammarly with Google Docs and make your writing smoother, error-free, and readable.
However, some people might find it too difficult to integrate Grammarly with Google Docs. That’s the reason why we have curated this detailed, in-depth blog post on Grammarly with Google Docs.
How to Add Grammarly to Google Docs
Step 1: Go to Google Search
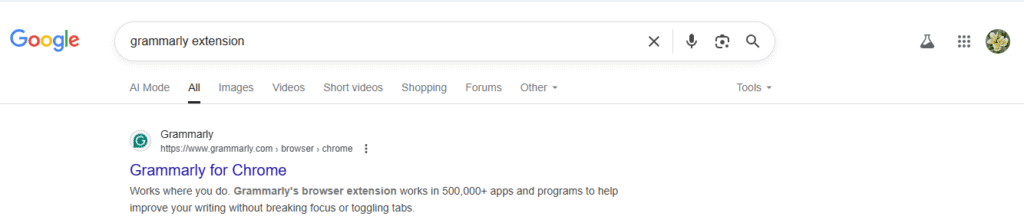
First, you need to go to Google Search and look for the Grammarly browser extension. You can directly type “Grammarly browser extension” on Google and click on the first link.
If you are using Chrome, which is the most popular browser, then you can click on the first link and install the extension. If you are using other browsers like Microsoft Edge or Safari, then you need to type on Google the following keywords.
Grammarly for Microsoft Edge – if you are using Microsoft Edge as your browser.
Grammarly for Safari – if you are using the Safari browser.
Step 2: Install Grammarly for Chrome
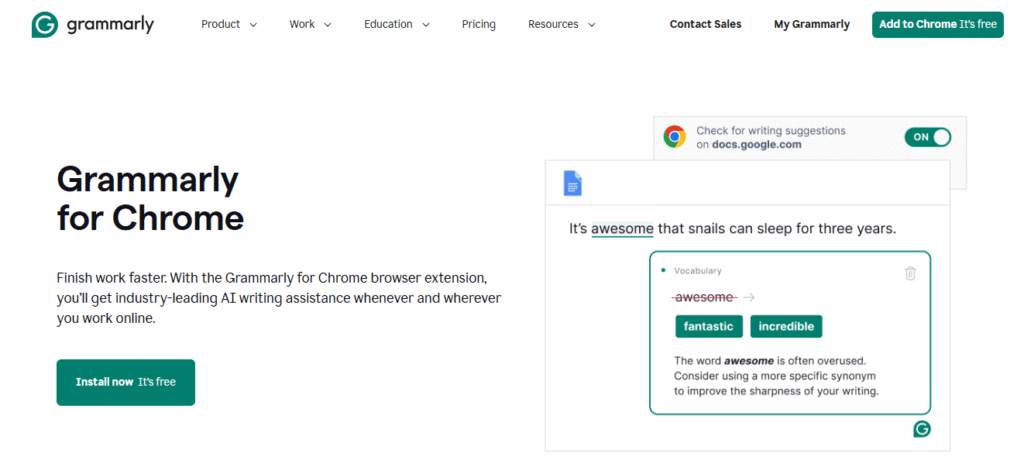
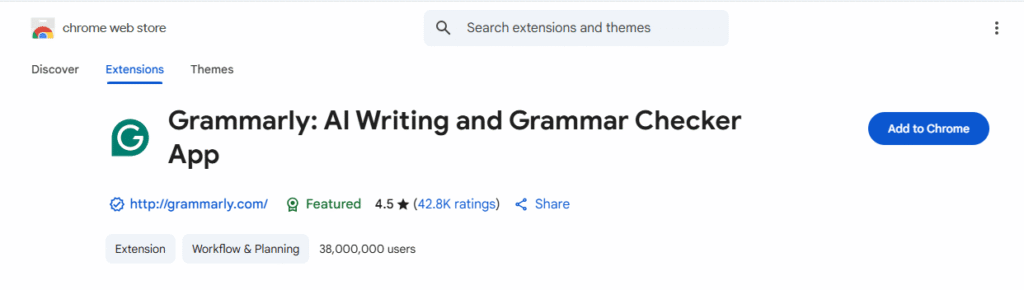
In step 2, you need to install Grammarly for Google Docs or Chrome by clicking on the install now button. Installing Grammarly is 100% free, and you won’t be charged a penny for using it. There is no signup fee and no login credentials required as well.
Once you click on the install now button, you will be taken to the Chrome Web Store page.

Now you will see the “Add to Chrome” option, and you need to click on it.
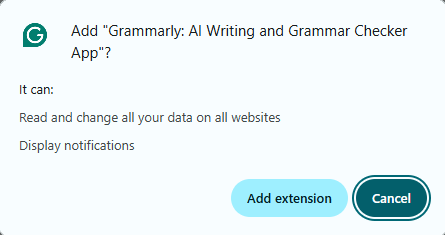
Now, click on the “Add Extension” button, and then you will be directed to another web page.
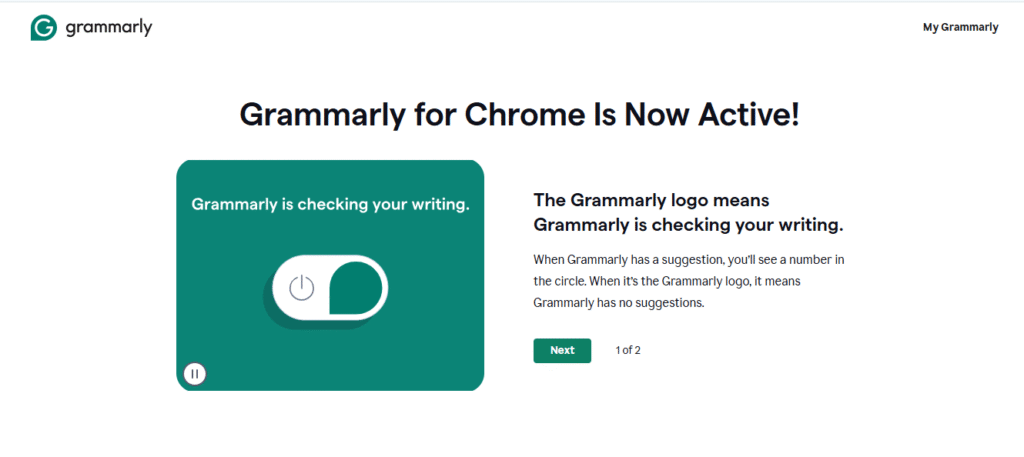
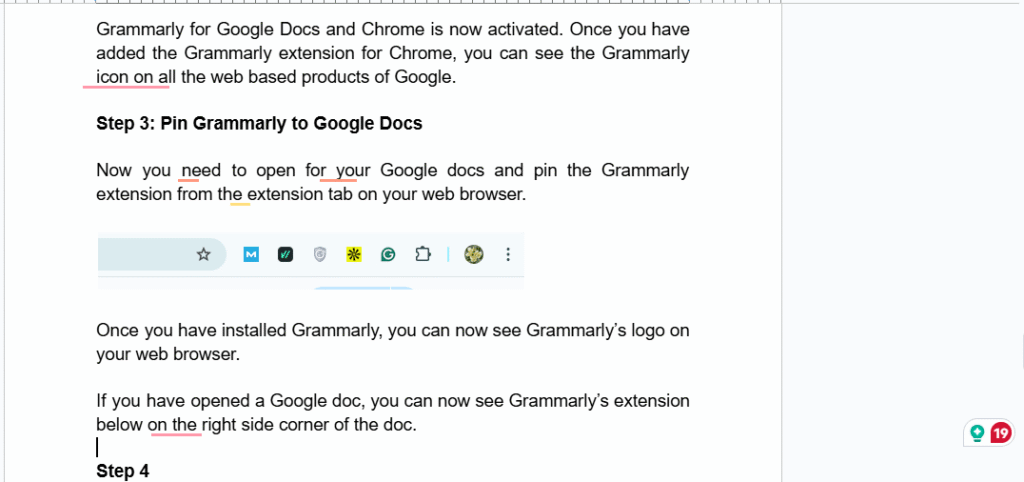
Grammarly for Google Docs and Chrome is now activated. Once you have added the Grammarly extension for Chrome, you can see the Grammarly icon on all the web-based products of Google.
Step 3: Pin Grammarly to Google Docs
Now you need to open your Google Docs and pin the Grammarly extension from the extension tab on your web browser.

Once you have installed Grammarly, you can now see Grammarly’s logo on your web browser.
If you have opened a Google Doc, you can now see Grammarly’s extension below on the right side of the doc.
Congratulations! You have now successfully installed Grammarly on Google Docs.
Before we move ahead in the blog post, there are some more ways by which you can add Grammarly to Google Docs.
Step 1: Type Grammarly to Google Docs” on Google.
Go to Google search and type Grammarly into Google Docs. You will see a direct link that will take you to the installation page of Grammarly in Google Docs.
Click on the first link.
Step 2: Sign up using Gmail.
If you are using Gmail, then sign up using your Gmail account or any other email account that you are using.
Once you have finished with the signup process, the Grammarly app will open automatically.
Now you need to head towards the App section on the left side and install Grammarly for Chrome and other apps on which you want to use Grammarly.
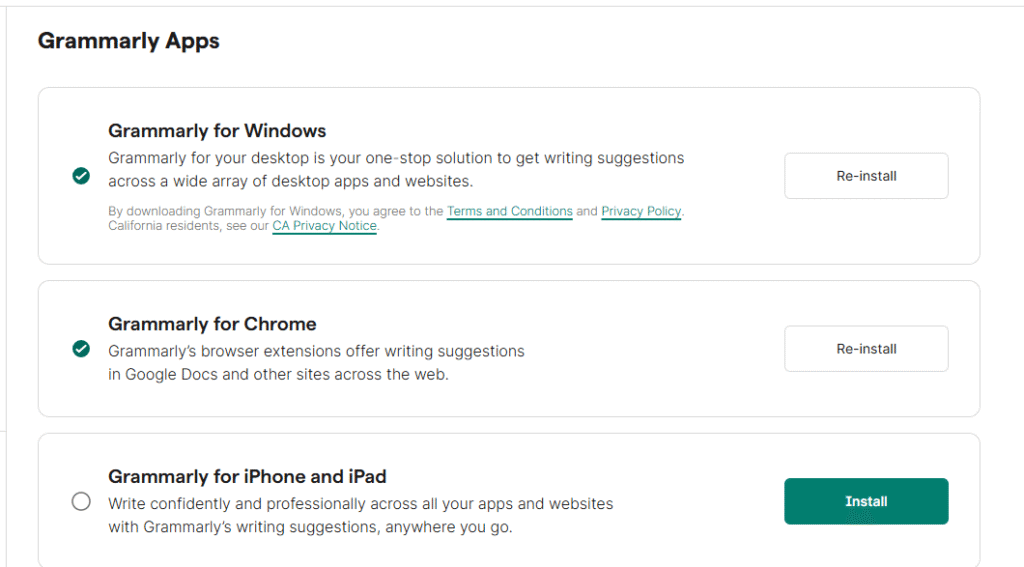
We have already installed Grammarly on Google Docs and Windows.
Step 3: Click on Install Grammarly to Google Chrome.
Once you click on the Install Grammarly to Chrome option, you will be taken again to the Chrome Web Store, where you need to add the Grammarly extension to Chrome again. [We have already discussed these points above.]
After adding the Grammarly extension to Chrome, Grammarly’s logo icon will appear on Google Docs again.
How to Get Grammarly on Google Docs?
Getting Grammarly to Google Docs is like child’s play. We have shown to you two different ways by which you can add Grammarly to Google Docs and use it on Google and its other web-based products.
The first method is to install Grammarly’s browser extension to Chrome from Google’s webstore. You can visit the webstore of Google or simply type “Grammarly extension for Chrome” on Google. Once the extension is installed, you need to log in to the Grammarly account from Gmail or any other email account. Now you need to open Google Docs in the same browser, and the Grammarly icon will automatically appear on the right side of Google Docs.
You’ll notice a green “G” icon at the bottom right of your Google Docs page. Click it to see real-time suggestions, explanations, and corrections. Grammarly works in the background and helps you write better without interrupting your workflow.
If you’re using Grammarly Premium, you’ll also get access to advanced features like vocabulary enhancement, tone detection, and more. Whether you’re writing an essay, report, or email, Grammarly on Google Docs ensures your writing is professional, clear, and mistake-free.
How to remove Grammarly from Google Docs?
If you are not satisfied with Grammarly on Google Docs, you can also take it off and use any other tool that you like. Here are the steps by which you can remove Grammarly from Google Docs.
You can open Google Docs directly and right-click on the Grammarly icon on the Chrome extension bar.

Once you right-click on it, you will get an option to remove Grammarly from Chrome. After doing it, Grammarly will be removed from Chrome, and you won’t see the Grammarly icon on Google Docs.
This was the easiest and quickest way by which you can remove Grammarly from Google Docs.
Some other steps to remove Grammarly from Google Docs are as follows:
- Open Chrome and click the three-dot menu in the top-right corner.
- Go to Extensions > Manage Extensions.
- Find the Grammarly extension.
- Click Remove to uninstall it completely, or toggle the switch to disable it temporarily.
For Microsoft Edge :
- Click the three-dot menu in Edge.
- Go to Extensions.
- Locate Grammarly and choose Remove or Disable.
For Firefox:
- Click the menu (three lines) and go to Add-ons and themes.
- Select Extensions.
- Find Grammarly and click Remove.
Once the extension is removed or disabled, Grammarly will no longer function inside Google Docs or any other website. You can always reinstall it later from the browser’s extension store if needed.
Why Is Grammarly Not Showing on Google Docs?
If you have installed Grammarly in your Google Doc, then sometimes it might not work properly or might work slowly. So, if Grammarly is not showing on Google Docs, then these are the possible reasons:
Related Content: Is Grammarly Safe?
You have not installed Grammarly: The first reason why Grammarly is not showing on Google is that you have not installed the extension on your browser. In this case, you need to install the Grammarly extension on your web browser.
Poor internet connection: Your internet or wifi connection is not working properly. In order to use Grammarly, you need to have a strong internet or wifi connection. Without the internet, Grammarly won’t work on Google Docs. Make sure to have a stable and good internet connection to use Grammarly on Google Docs.
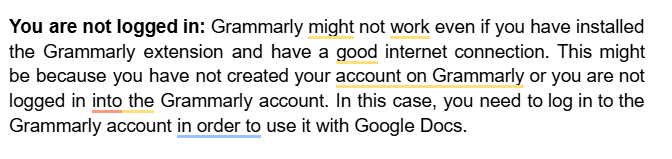
You are not logged in: Grammarly might not work even if you have installed the Grammarly extension and have a good internet connection. This might be because you have not created your account on Grammarly or you are not logged in to the Grammarly account. In this case, you need to log in to the Grammarly account to use it with Google Docs.
Related content: Is QuillBot Detectable?
Unsupported device or browser: If you are using an outdated browser that Grammarly does not support, then Grammarly won’t work on Google Docs. Also, if your computer or laptop system is outdated, Grammarly won’t work. Make sure you only use the browser and system that Grammarly supports.
Related content: QuillBot AI Review
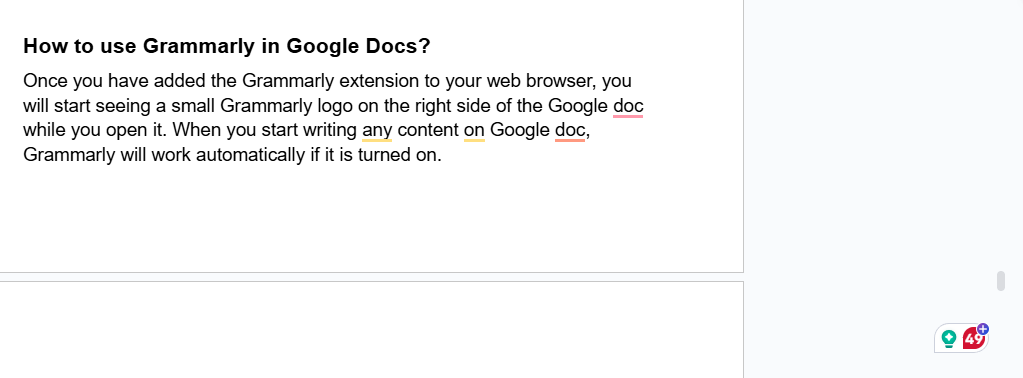
How to use Grammarly in Google Docs?
Once you have added the Grammarly extension to your web browser, you will start seeing a small Grammarly logo on the right side of the Google Doc while you open it. When you start writing any content on Google Docs, Grammarly will work automatically if it is turned on.
If you want to know how you can use Grammarly with Google Docs, then we have shared some ways below:
1. Grammarly for content writing with Google Docs
At Rocket Ranker, we have been using Grammarly with Google Docs for all our content writing and related tasks. With the Chrome browser extension, Grammarly gets directly integrated into Google and its web products and offers real-time checking of grammar, spelling, and punctuation mistakes as you write.
For example, we are writing this content on Google Docs, and Grammarly highlights some of the mistakes made in the content. This seamlessly ensures that your content remains polished, professional, and free from any grammatical error. Even if you have made some basic spelling mistakes, Grammarly will highlight them.
In the above image, the words highlighted in yellow need improvement. This feature is available only with the premium Grammarly version. While the words highlighted in red are grammatical and spelling errors, and the words highlighted in blue are simple errors.
Related content: What is QuillBot?
For bloggers and content writers who write long-form content like blogs and articles or marketing copies, Grammarly with Google Docs is a blessing for them. It offers more than just basic proofreading. It suggests improvements for clarity, conciseness, tone, and engagement, allowing writers to enhance their work.
2. For styling and enhancing the content
If you have integrated Grammarly with Google Docs, then it can be a powerful tool not just for correcting silly grammar mistakes but also for styling and enhancing the content. Whether you are writing a long blog post, making reports, or writing marketing copies, Grammarly will help you to evaluate your writing by improving your tone, sentence structure, and word choice.
It offers suggestions that go beyond surface-level errors and helps to refine the content and make it more professional, engaging, and tailored to your audience.
For content writers and bloggers using Google Docs, Grammarly’s browser extension integrates seamlessly and gives real-time suggestions by analyzing text and recommending changes to make your writing more concise, readable, and impactful. For example, it may suggest replacing weak verbs with stronger ones, shortening wordy sentences, or adjusting tone to match the purpose, whether it’s formal, friendly, or persuasive.
3. For editing and proofreading articles
If you are struggling with editing content on Google Docs, then Grammarly can be an indispensable tool for editing and proofreading your work and making sure that your content is clear, error-free, and polished. Whether you are a blogger, writer, journalist, or content marketer, Grammarly helps to catch grammatical mistakes, punctuation errors, and awkward phrasing that can affect the quality and credibility of your writing.
When integrated with Google Docs via a browser extension, Grammarly works in real time by offering suggestions as you type. It will highlight the error, and you can correct all those within a single click.
It also provides an explanation, which will allow you to learn and improve your overall writing skills with every correction. This feature is helpful when proofreading long-form content, where minor errors can easily go unnoticed.
Grammarly goes beyond basic correction and helps you to refine your article’s flow and structure. It also suggests which sentences are to be rewritten for clarity and flags overused words so that your content becomes more readable. The tone detector and style suggestion ensure that content is aligned with the intended audience, whether you are writing formal, casual, or informative content.
Related content: Grammarly vs. ProWritingAid
4. Check for plagiarism and AI
If you are a blogger or content writer, then you might already know that AI content and plagiarism are a big NO to Google. Google has welcomed AI-generated content, but content solely written for the purpose of ranking on Google won’t ever rank.
This is where Grammarly’s AI and plagiarism checker come into the picture. Sadly, both of these features are available only on the paid version of Grammarly and will scan your content with billions of texts on the internet and also check whether the content is AI-generated or not.
This feature is useful for writers and bloggers who need to generate unique and high-quality content regularly. When using Grammarly with Google Docs, you can quickly identify any copied content and make the necessary revisions before publishing the original work.
Related content: QuillBot AI Checker
While Grammarly does not natively detect AI-curated content, its advanced writing suggestions can help you identify natural and unnatural content, allowing writers to humanize their work and polish it with AI-assisted drafts. For more accurate AI detection, you can consider using tools like GPT detectors.
5. Vocabulary enhancement
Without any doubt, Grammarly is a powerful tool for vocabulary enhancement and improvement, especially when someone is using it with Google Docs. When Grammarly is used with Google Docs, it will give some real-time suggestions, identify weak and repetitive words, and also recommend some impactful alternatives to improve the content and make it more readable.
Related content: QuillBot Plagiarism Checker
When you write something on Google Docs, Grammarly will help you expand and improve your vocabulary by suggesting context-appropriate word choices that match the tone and purpose of your writing.
When using Grammarly with Google Docs, vocabulary suggestions will appear directly within your content. This seamless integration of Grammarly with Google Docs saves time and effort and improves the writing without switching over to other online grammar-checking tools. Grammarly also gives detailed explanations of why a particular word may be a better fit, helping you learn and grow as a writer.
6. Inline editing
This feature is useful for writers, students, and professionals who use Google Docs for all their writing pieces. Grammarly makes inline editing easy and simple, just like eating a piece of cake. With Grammarly for Google Docs, suggestions for grammar, spelling, and tone clarity appear directly within the text as you write. This makes in-line editing easy and quick with a click. Also, the flow of writing is not broken, and users don’t need to switch to other online editing tools for proofreading content.
The inline editing feature of Grammarly helps to streamline the revision process by highlighting the words that need editing or can be edited with another alternative word, which is easier to understand and read.
Grammarly also provides clear explanations for each suggestion, which will help the writer to understand the reason behind the correction and improve their overall writing skill.
Related content: Is QuillBot Safe?
7. Long-form content checking
All bloggers can relate to this point. If you are a blogger, then you might already be aware of the importance of long-form content creation, and Grammarly becomes more useful for long-form content checking, making it an essential tool for all bloggers, along with writers working on reports, eBooks, or academic papers in Google Docs. Long-form content is anywhere between 3000 and 7000 words.
Some might even go beyond 7000+ words, and as content grows in length, so does the risk of grammatical mistakes. Grammarly can come into play here and help those working on long-form content creation.
When Grammarly is used with Google Docs via the browser extension, bloggers and writers can easily detect all the grammatical mistakes in their content and also correct it as they are writing on the spot. Grammarly even detects tone shifts and recommends smoother transitions to ensure writing flows well from start to end. It also highlights repetitive words, language, and overused phrases and helps to polish the writing more.
For all the bloggers, content writers, marketers, and professionals, Grammarly with Google Docs simplifies the writing and editing process of long-form content, which saves time and improves the overall quality of content.
Related content: Grammarly Review
8. Helping students with essay writing
School and college students always get assignments to write essays on various topics. Grammarly can act as a valuable tool, especially when used directly with Google Docs. Writing an essay is not a big task, but editing and proofreading it can be a daunting task for students.
A good essay requires proper structure, strong arguments, and clarity. Only Grammarly can help students tackle all these challenges by offering suggestions. It will make essay writing smoother and more subtle by improving the technical accuracy of writing.
Grammarly with Google Docs will help students to get immediate feedback as they type. The tool will highlight the issues, such as awkward phrasing, run-on sentences, active and passive voice issues, spelling mistakes, poor choice of words, and more.
For students who struggle with writing or learning English, Grammarly will help them by providing explanations and making them understand the mistakes they are making while writing.
Whether it is a persuasive, narrative, or simple essay, Grammarly makes the writing and editing process easy and less stressful. It empowers students to write in English with confidence and improve their overall writing and vocabulary skills.
How to turn on Grammarly in Google Docs after turning it off

As you can see, we have now turned off Grammarly from our browser, and if you want to turn on Grammarly again, then you can simply click on the browser extension of Grammarly, and it will automatically start working again.
How to Turn Off Grammarly from Google Docs?
If you just want to temporarily disable Grammarly in Google Docs without uninstalling it, follow these steps:
For Google Chrome or Microsoft Edge:
- Click on the Grammarly extension icon in the top-right corner of your browser.
- In the popup, click the gear icon ⚙️ (Settings).
- Toggle “Check for writing suggestions on Google Docs” to OFF.
Alternatively:
- Right-click the Grammarly extension icon.
- Select “Manage Extensions.”
- Turn the toggle switch OFF to disable Grammarly temporarily.
This will stop Grammarly from working in Google Docs while keeping the extension available for other sites.
How to Remove Grammarly from Google Docs?
To completely remove Grammarly from Google Docs, you’ll need to uninstall the browser extension:
For Chrome:
- Click the three dots (menu) in the top-right corner.
- Go to Extensions > Manage Extensions.
- Find Grammarly and click Remove.
For Edge:
- Click the three-dot menu > Extensions.
- Locate Grammarly and click Remove.
Once removed, Grammarly will no longer appear in Google Docs or any other websites.
FAQs on How to Add Grammarly to Google Docs
Install the Grammarly browser extension (Chrome, Edge, Firefox). It auto-integrates with Google Docs.
Yes, Grammarly works seamlessly with Google Docs when using a supported browser extension.
No, the free version works, but Premium unlocks advanced writing suggestions.